
Streamlined Gocco Tutorial (for my peeps)
Here is the streamlined tutorial version for people like my mom and knitting circle gals, who I don't want to bore to tears looking though 55 photos on my "extensive" tutorial.
1. Put photocopied drawings on the pad. Insert the master screen which is the cardboard frame with silkscreen inside.
2. Place your lightbulbs into the mirrored housing and place them on top of the print gocco machine.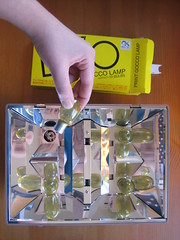
3. See how the lamp housing is inverted on the machine so that the lights are aiming directly to the master screen beneath it? When you press down on the machine, it sends a current from the batteries to the bulbs thus bursting them and creating enough heat to burn the screen. The screen is treated with an emulsion that activates and burns in areas where carbon and the heat from the lights interact. It does flash, but nothing dangerous. (I swear, Ma!)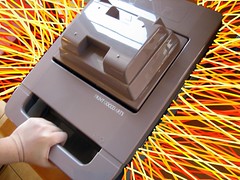
4. After you wait for the bulbs to cool, you can remove them from the mirrored housing unit. See how they crack and pop after they're used up?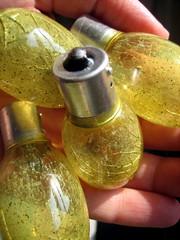
5. The carbon on the image (black areas) sticks onto the screen where it has burned. You can see a ghost image on the screen. These areas where it was burned means that there is are hundreds of tiny holes for the ink to come through and print on your paper. The other areas are not burned, so no ink will go through.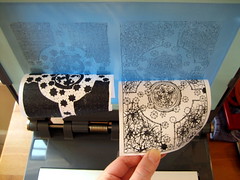
6. Ink is applied on the screen for the various colors you want to use. I applied a foamy sticker around the pools of color, to keep them from running into each other into a globby mess. The plastic layer goes over the ink, so that it doesn't make a mess.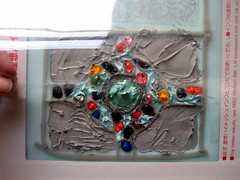
7. See, gocco is kind of a combination of silkscreen and rubber stamping. You're burning a screen like in silkscreen, but you are not inking and dragging a brayer across the screen to make a print each time. Instead, you're inking enough for multiple prints, and using pressure to make the ink press against the plastic sheet and glass, flatten out and flow through your image. (Kind of like a rubber stamp).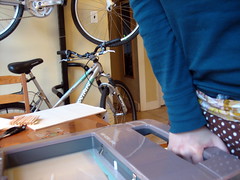
8. After you press down the top of the machine, lift it up and you'll have a print on your paper! Then you can run around the house looking for empty surfaces to print on, as it's that addicting.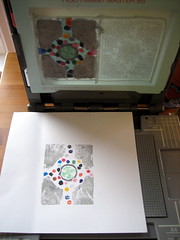
9. When you're done printing, hang them or lay them flat to dry.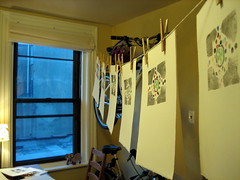
10. You're done! Clean up and treat yourself to some ice cream with sprinkles.
P.S. I really do want to have a gocco party soon, for real life demonstrations, it's just been a busy month of weddings, traveling and miscellaneous riff-raff.


14 comments:
This is so cool! Thanks for sharing- your creativity is very inspiring.
Wow, that's pretty intense. The bulb bursting process is sorta like that bug that is killed by having its baby. Okay, maybe not. I'm totally up for the party, though!
I am bookmarking this for when I finally work up the courage to try this!
Hi - I know I am a little late in the gooco discovery world but I really really want one too!
Have just read through your blog and esp liked the bit about when you were debating which model to buy - do you feel you made the right decision? I would be interested to know your thoughts now that you have used it?
Gocco dreaming...
Sounds very cool! I'd like to have one too... but i have read on wikepedia that can be dangerous so now im very confused.
anyway thanks a lot for the lovely tutorial!!!
x
I have been wanting a Gocco, for like ever! Thanks for the tutorial. Do you have any suggestions which version I should get, PG-10, PG-6?
Thank you for this tutorial! I almost set out to translate my guide from Japanese to English...(joking). Seriously, this was super helpful!
Thanks for sharing this link, but unfortunately it seems to be down... Does anybody have a mirror or another source? Please answer to my post if you do!
I would appreciate if a staff member here at vanillabeanknits.blogspot.com could post it.
Thanks,
Harry
Hi Peter. I would email you, but don't know what you're talking about. :) Would you please expand on your question? What kind of mirror are you looking for?
By the way, this is a craft / personal blog, not a business, but I'll do my best to help you!
Thanks for sharing this link, but unfortunately it seems to be offline... Does anybody have a mirror or another source? Please reply to my message if you do!
I would appreciate if a staff member here at vanillabeanknits.blogspot.com could repost it.
Thanks,
William
Hi William, I'm not sure if this is a spam post or not...
I would recommend asking on the Gocco group on Flickr.com, they may have more resources. I have not been keeping up with gocco news lately.
Good luck to you!
Thanks, Marissa
Hello there,
I have a question for the webmaster/admin here at vanillabeanknits.blogspot.com.
Can I use part of the information from this blog post right above if I give a backlink back to your website?
Thanks,
Alex
Hi Adam,
Thank you for asking. As long as you credit me and it is not a spam type blog / account, feel free to use some of the information.
Thanks,
Marissa
Hi - I am definitely happy to discover this. Good job!
Post a Comment